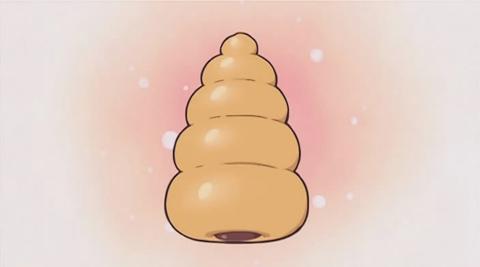
<---"The chocolate cornet in the anime "Lucky Star"
For the recipe, I used the one provided by Cooking with Dog, a YouTube cooking channel. However, I tweaked it according to what I had in the pantry already so I didn't add any milk powder, cocoa powder, etc. Instead, I substituted them with milk making sure to add more flour, hot chocolate mix, and I omitted the amount of corn starch in the original recipe because I thought the chocolate mixture was too thick for my liking.
Anyways let's begin! This recipe yields 3 chocolate cornets (since I'm on a diet like Kagami *Lucky Star reference*), but you can double the amount as you like.
Step 1: Combine 1 cup of flour, 1/2 tablespoon of sugar, and a pinch of salt.
Combine well.
Step 2: Combine 1/2 teaspoon of dry yeast with a 1/2 tablespoon of lukewarm water.
It should look like this; the yeast should be completely dissolved.
Step 3: Combine 1/2 tablespoon of beaten egg with the remaining 5 tablespoons of lukewarm water. Add the yeast and egg mixture into the dry ingredients. Mix until it forms a ball.
Cut up a tablespoon of unsalted butter into chunks and work it into the dough.
| Cover the dough with plastic wrap and let it sit for one hour. |
Time for the Chocolate Filling!
Step 4: Warm up 6 tablespoons of milk on the lowest setting to prevent the milk from burning.
Step 5: Combine one egg yolk, a tablespoon of sugar, a teaspoon of corn starch, and a tablespoon of cocoa powder.
Step 6: Once the milk is warm, gradually add the hot milk into the egg, being extremely careful to whisk in the milk a little at a time since the egg could scramble. Thus, the custard wouldn't be smooth! Take your time whisking in the milk until everything is whisked in.
Step 7: Pour the milk, egg mixture back into the pot and bring the heat to a low medium. Whisk until the mixture thickens. Add in one tablespoon or more of chopped chocolate (how much is up to you).
Optional: You can add a teaspoon of unsalted butter to give the chocolate a nice shine.
Step 8: Transfer the chocolate custard into a bowl and cover with plastic wrap. Chill it in the fridge until you are ready to make the dough.
Remember to butter them so the bread comes off the mold easily!
Back to the Dough!
| One way to know if the dough has risen enough is to cover your finger with flour and poke the dough. If the hole stays and doesn't cave in, the dough is ready! However if the dough "springs back", it needs to rest more. |
Step 10: Evenly divide the dough into three balls.
Cover with a damp paper towel and let rest for about 10 minutes.
Step 11: Flatten out the dough balls and roll them into coils that are about a foot in length. One end should be thinner and the opposite end should be fatter. This creates its Caterpillar shape!
Step 12: Form the spiral by placing the thinner end of the coil 1 inch above the tip of the mold. Spin it around the mold until it is completely raveled. Then pinch the fat end to seal.
Cover the dough with a damp paper towel or plastic wrap for another 15 or so minutes.
Step 13: Beat an egg and brush the cornets with the mixture. This makes the bread golden brown.
Then preheat the oven for 400 degrees Fahrenheit and bake for about 10 minutes.
Step 14: Allow the bread to cool until you can handle them. Gently wiggle the molds out.
Step 15: Spoon the chilled chocolate custard into a corner of a plastic bag. Tie shut with a rubber band. Snip the corner and place the tip into the bigger hole of the bread. Squeeze until the bread is filled with deliciousness!
The Results! Which end do you bite first: the fat one or the skinny one?
Rating: 10/10 They were so good. I loved the rich, gooey chocolate and the sponginess of the bread. It satisfied my hunger as well! Enjoy with a glass of milk.
No comments:
Post a Comment